
Today, I am diving into a very practical topic: how to adjust the time on your Fire TV Stick.
Whether you’ve traveled to a new time zone or moved to a different country, this guide will help you ensure that your Fire TV Stick displays the correct time.
Why Adjust the Time on Your Fire TV Stick?
You might wonder why it’s necessary to adjust the time on your Fire TV Stick since it updates automatically and syncs with Amazon servers.
Well, if you’ve gone on holiday or relocated, you might find that the time displayed is still set to your home country’s time zone.
To avoid confusion and ensure you’re viewing the correct time, a manual adjustment might be necessary.
Changing Time On Firestick: Step By Step Guide
Adjusting the time on your Fire TV Stick is a straightforward process. Here’s how you can do it:
Step 1: Opening Settings
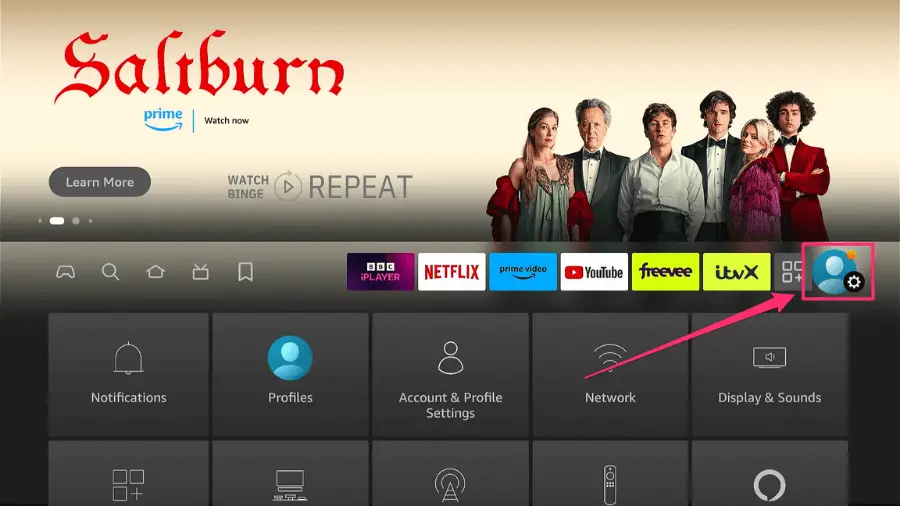
- First and foremost, navigate to the main menu of your Fire TV Stick.
- Open the ‘Settings’ option.
Step 2: Accessing Preferences
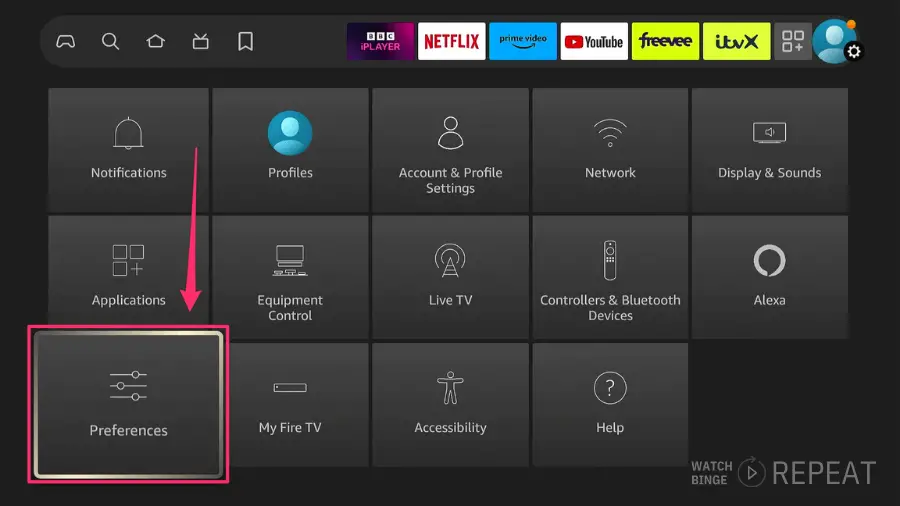
- In the Settings menu, scroll down to find ‘Preferences.’
- Select ‘Preferences’ to access more options.
Step 3: Selecting Time Zone
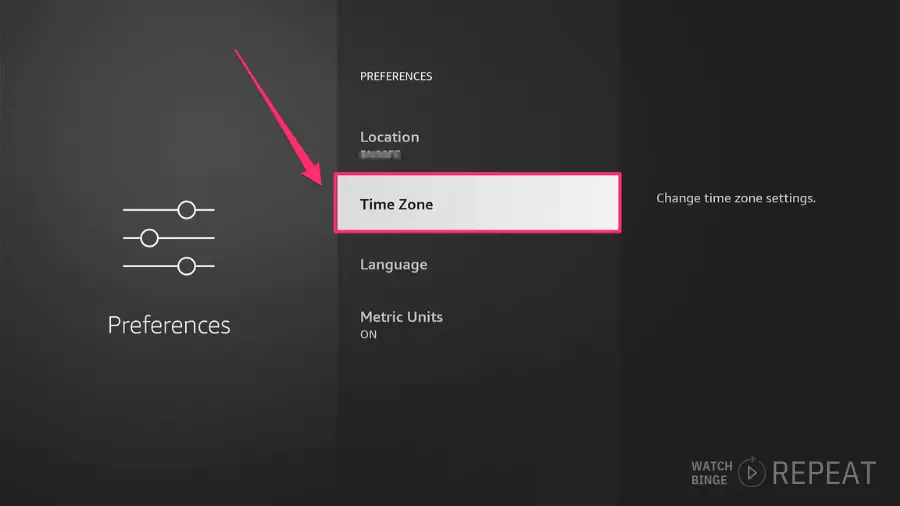
- In the Preferences menu, scroll to the very bottom.
- Here, you will find the ‘Time Zone’ option.
- Click on ‘Time Zone’ to proceed.
Step 4: Changing Your Region
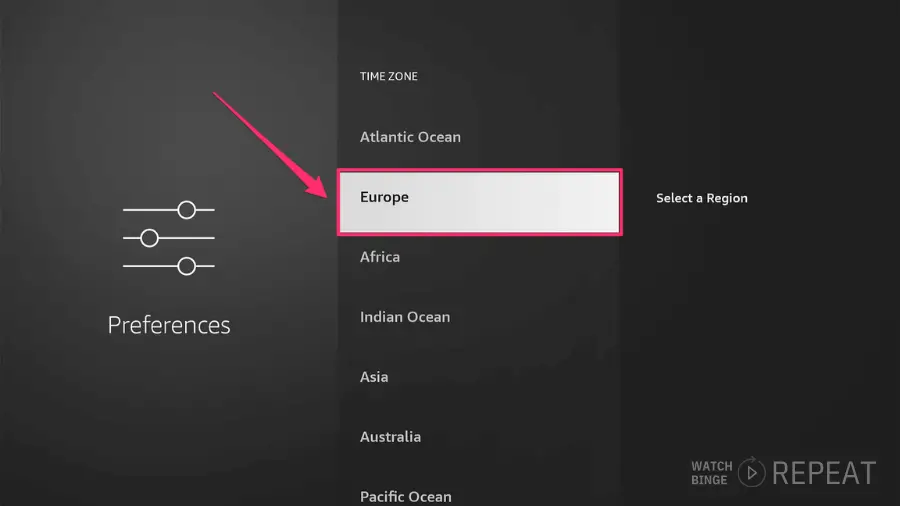
- You will now be presented with options to change your region.
- For example, select ‘Europe’ if that’s where you are located.
Step 5: Picking Your Time Zone
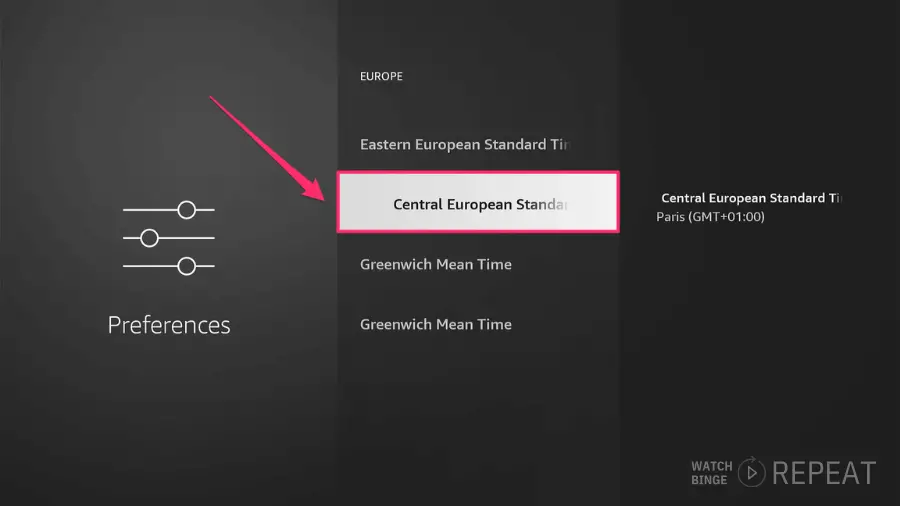
- After selecting your region, choose the specific time zone you are in.
- For instance, select ‘Central Europe Standard Time’ if that applies to you.
Step 6: Automatic Date and Time Setup
- Once you have selected your time zone, the date and time will be set up automatically.
- Note that when connected to Wi-Fi, your device will always display the correct date and time.
Step 7: Adjusting 24-Hour Time Format
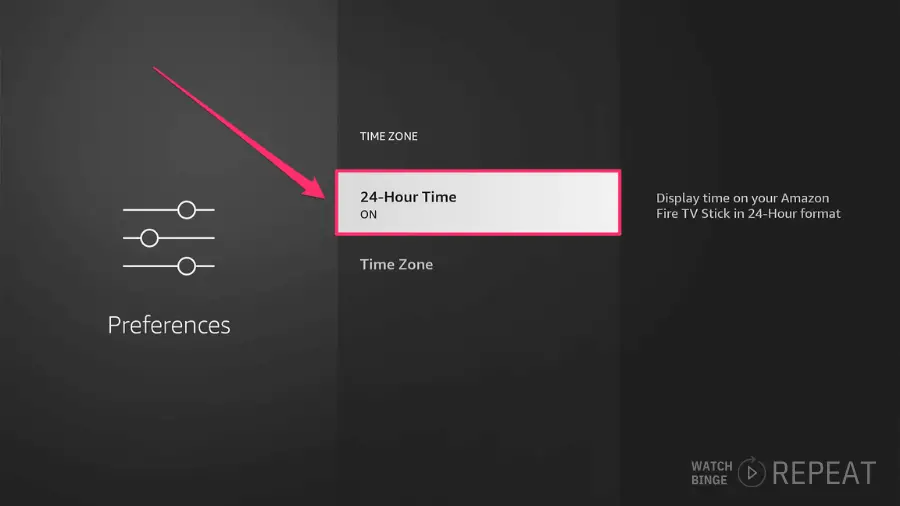
- Additionally, you have the option to change the time format to a 24-hour clock.
- To do this, simply select the 24-hour time format option.
- You’ll notice the time format change in the right-hand corner of the screen.
Step 8: Finalizing Settings
- After completing these adjustments, simply go back to the main screen.
- Your settings are now updated!
Reverting or Changing Again
If you need to revert to your original time zone or switch to another, simply follow the same steps and select the desired time zone.
Closing Thoughts
Adjusting the time on your Fire TV Stick is a simple yet important task, especially for those who travel frequently or have relocated. We hope this guide has been helpful.