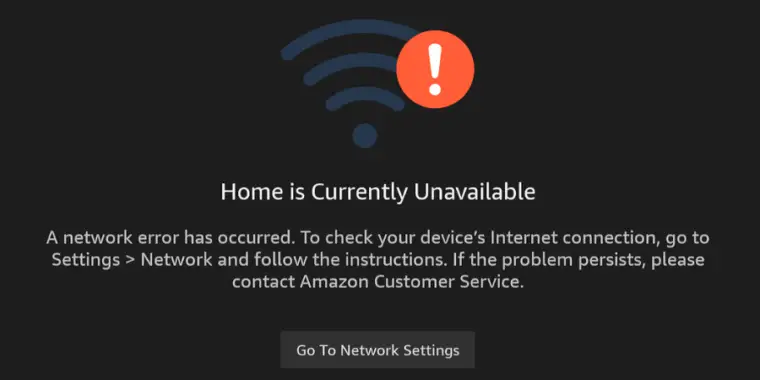
Struggling with the ‘Home is Currently Unavailable’ error on your Fire Stick?
This issue is usually due to network problems, but don’t worry, it’s fixable.
Follow these simple steps I’ve put together, and you’ll have your Fire Stick back in action in no time.
Step-by-Step Troubleshooting:
Step 1: Restart or Reset Your Fire Stick
Encountering the ‘Home is Currently Unavailable’ message on your Fire Stick can often be resolved with a simple restart or reset. Here’s how to do it effectively:
Step 1.1: Performing a Quick Restart:
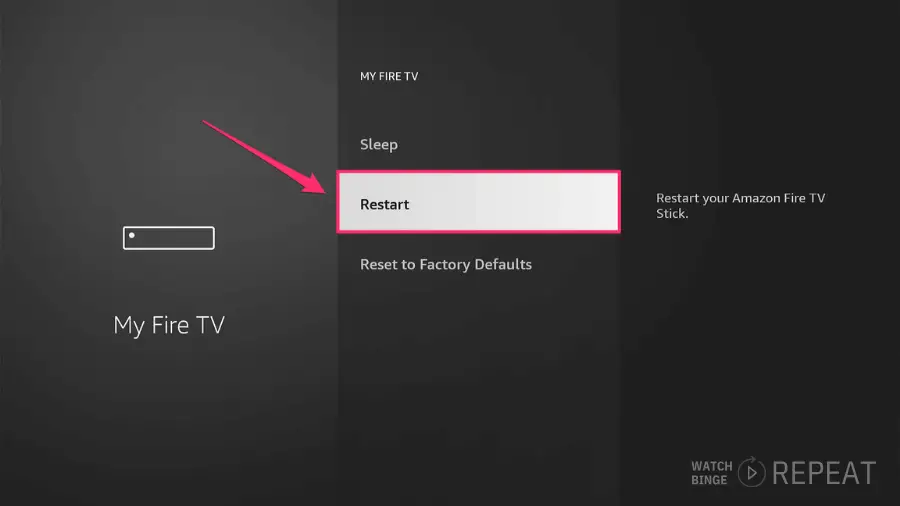
To quickly restart your Fire Stick, you have two options:
- Via the Menu: Navigate to ‘Settings’, then select ‘My Fire TV’. Here, you’ll find an option to restart your device.
- Using the Remote: Alternatively, you can press the play/pause and select buttons on your remote together and hold them for about five seconds. Your Fire Stick will reboot automatically.
Step 1.2: Opting for a Factory Reset
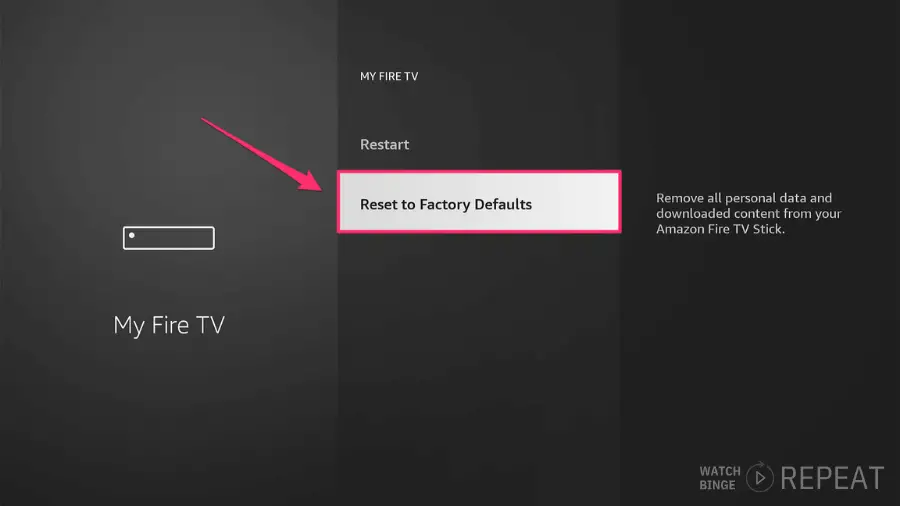
If your Fire Stick has been in use for a long time, or if you’re experiencing issues due to limited storage, a factory reset might be necessary. This process will restore the device to its original settings, as it was when new.
Important Note on Factory Reset: Before proceeding with a factory reset, be aware that this action will erase all content and apps on your Fire Stick. It’s a comprehensive reset that wipes the slate clean, so ensure you’ve backed up any important data or noted down any apps you wish to reinstall afterward.
Step 2: Forget and Reconnect to the Network
When the error on your Fire Stick persists even after a network scan, the next effective step is to reset your Wi-Fi connection.
This involves ‘forgetting’ your current network and then reconnecting to it, which can often resolve connectivity issues. Here’s how to do it:
Step 2.1: Accessing Network Settings
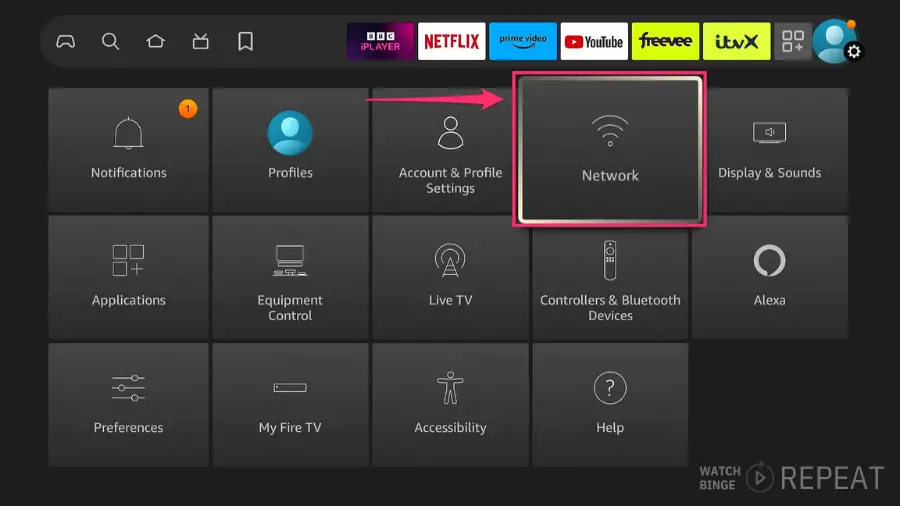
On your Fire Stick, go to the main ‘Settings’ menu. From there, navigate to the ‘Network’ option. This is where you can manage all Wi-Fi-related settings.
Step 2.2: Forgetting the Wi-Fi Network
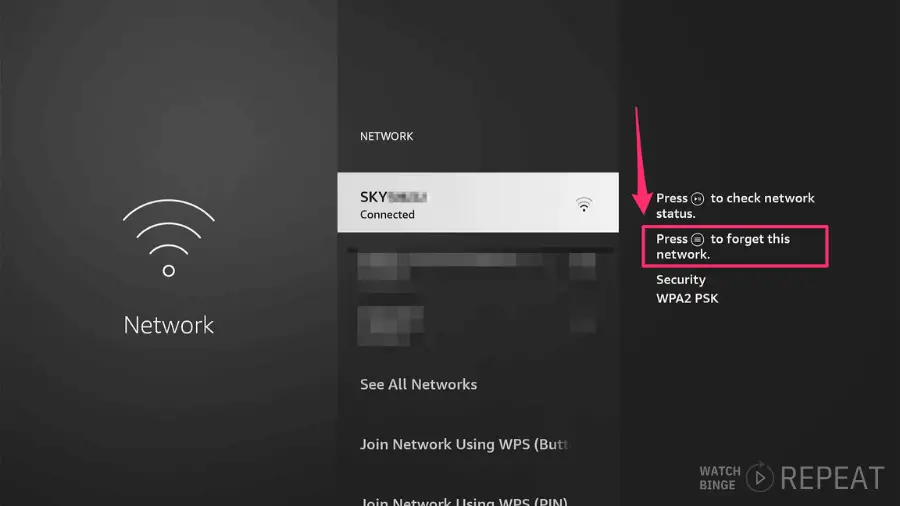
In the ‘Network’ settings, scroll to find your current Wi-Fi network. Then click on the menu button to remove the network from your Fire Stick’s memory.
Step 2.3: Reconnecting to Your Network
After ‘forgetting’ the network, you’ll need to reconnect. This is just like setting up a new Wi-Fi connection.
Select your network from the list of available networks, then enter your Wi-Fi password. Make sure to enter it correctly, as incorrect passwords are a common cause of connectivity problems.
Step 3: Check IP Address
This might sound technical, but it’s a straightforward process that can reveal a lot about your network’s health.
Step 3.1: Access Firestick’s Network Information
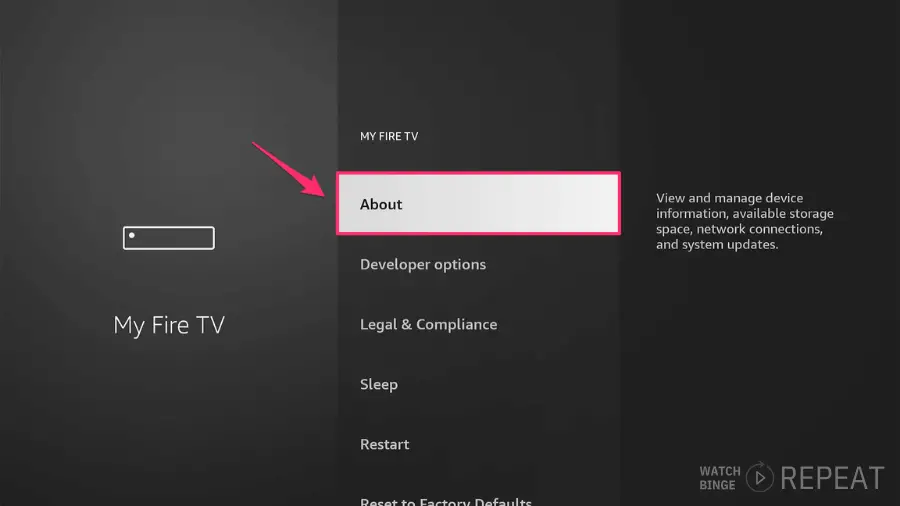
On your Firestick, navigate to ‘Settings’, then select ‘My Fire TV’. From there, go to ‘About’.
Choose ‘Network’. This path leads you to your device’s network details.
Step 3.2: Locate and Examine the IP Address
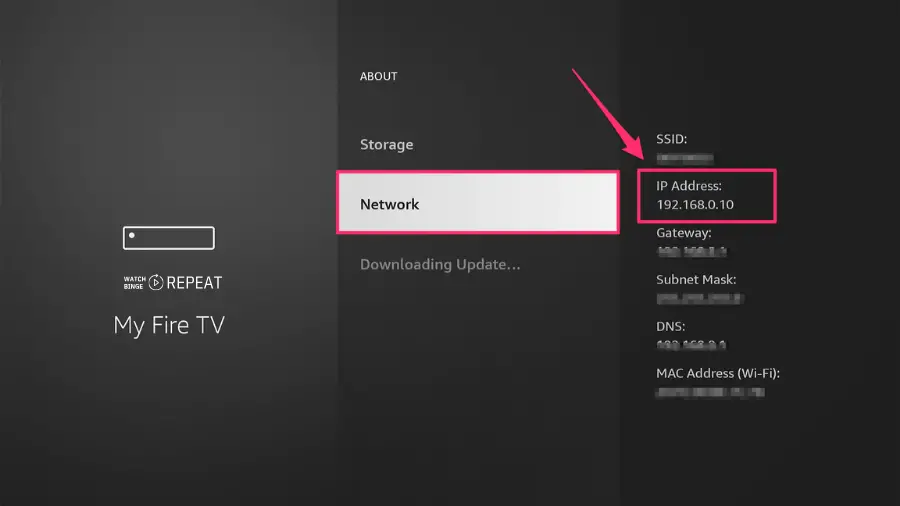
In the network information, you’ll find the IP address of your Firestick. Typically, a standard home network IP address starts with ‘192’.
This sequence indicates that your Firestick is properly communicating with your home network.
Step 3.3: Identify Potential Router Issues
If the IP address begins with ‘169’, this is often a sign of router-related problems.
In technical terms, this means your Firestick is unable to obtain a proper IP address from your router, which is essential for connecting to the internet.
If it’s your case you can follow this tutorial to fix the issue.
Step 4: Reset The Router
If you’ve tried the previous steps and your Firestick still displays the error, resetting your router could be the solution. This might sound technical, but it’s quite straightforward. Here’s how to do it:
Step 4.1: Locate Your Router
Find your internet router, which is usually a small box connected to your modem or directly to your internet line.
Step 4.2: Power Off
Turn off your router by pressing the power button or unplugging it from the power source. This action will temporarily disconnect your internet.
Step 4.3: Wait for a Minute
After turning off the router, wait for about 60 seconds. This pause allows the router to fully reset and clear any minor glitches.
Step 4.4: Power On
Turn your router back on by pressing the power button again or plugging it back into the power source.
Step 4.5: Reconnect Your Devices
Allow a few minutes for the router to restart and re-establish an internet connection. Then, reconnect your Firestick and other devices to the Wi-Fi network.
Step 5: Review Security Settings
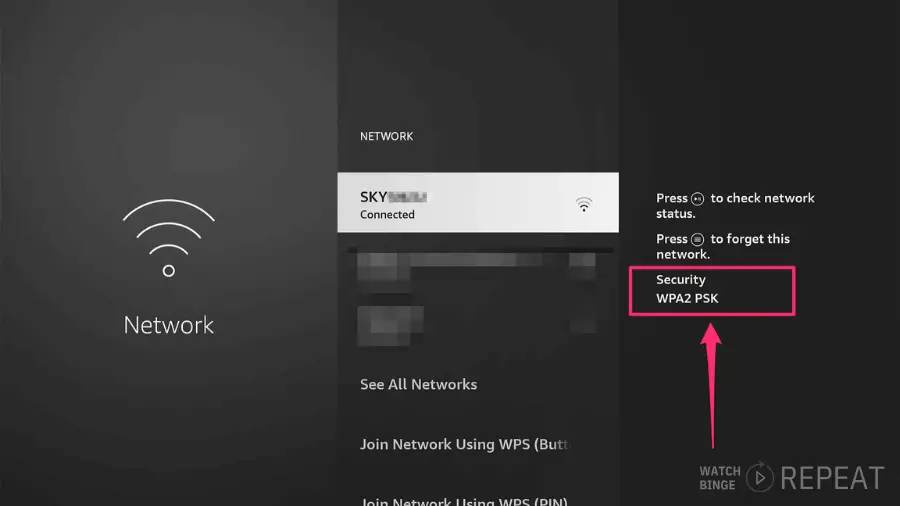
Ensuring your router uses the correct security protocol is crucial for a seamless connection with your Firestick.
Many modern devices, including the Firestick, still perform best with WPA2 PSK. (And there have been many people mentioning that Firestick is not connecting to the network if you are using WPA3)
Step 5.1: Access Your Router Settings
Log into your router’s interface, typically through a web browser. You’ll need the router’s IP address and login credentials, which are often found on the device itself or in its manual.
Step 5.2: Navigate to Security Settings
Once logged in, look for the Wi-Fi or security settings. This section allows you to configure how your router protects your network.
Step 5.3: Select WPA2 PSK
In the security settings, find the option for encryption or security protocol. Choose ‘WPA2 PSK’ from the list of available options.
If your router does not support WPA2 PSK, it might be time to consider upgrading your hardware for better performance and security.
Step 5.4: Save and Apply Changes
After selecting WPA2 PSK, save your changes and allow the router to reboot if necessary. This will ensure the new settings take effect.
Step 5.5: Reconnect Your Firestick
Once your router is back online with the updated settings, reconnect your Firestick to your Wi-Fi network and check if the issue is resolved.
For a more detailed guide on router security check this article from Norton
Step 6: Deregister and Reregister Your Fire Stick
Sometimes, the key to resolving the error is resetting your Firestick’s registration.
This process refreshes your device’s connection with your Amazon account and can often clear up lingering issues. Here’s how to do it:
Step 6.1: Access Your Account Information
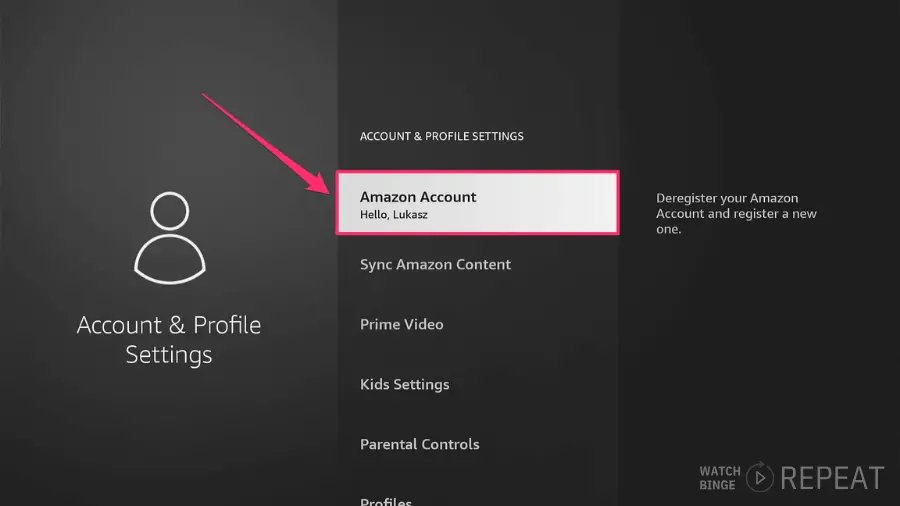
In the settings menu, find and select ‘Account & Profile Settings”. This option gives you access to your Amazon account details on the Firestick.
Step 6.2: Deregister Your Device
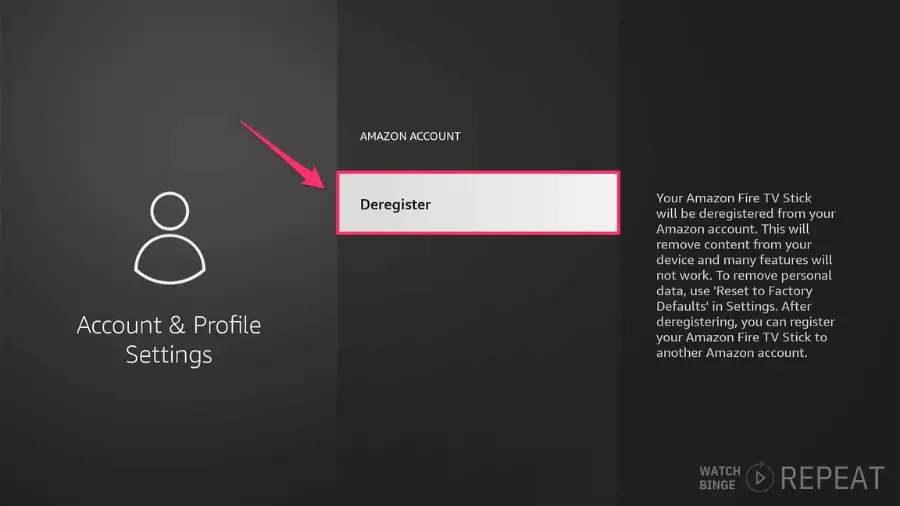
Under your account name, you’ll see an option to ‘Deregister’. Select this to remove your Firestick from your Amazon account.
A confirmation message will appear; confirm that you want to deregister.
Step 6.3: Reregister Your Firestick
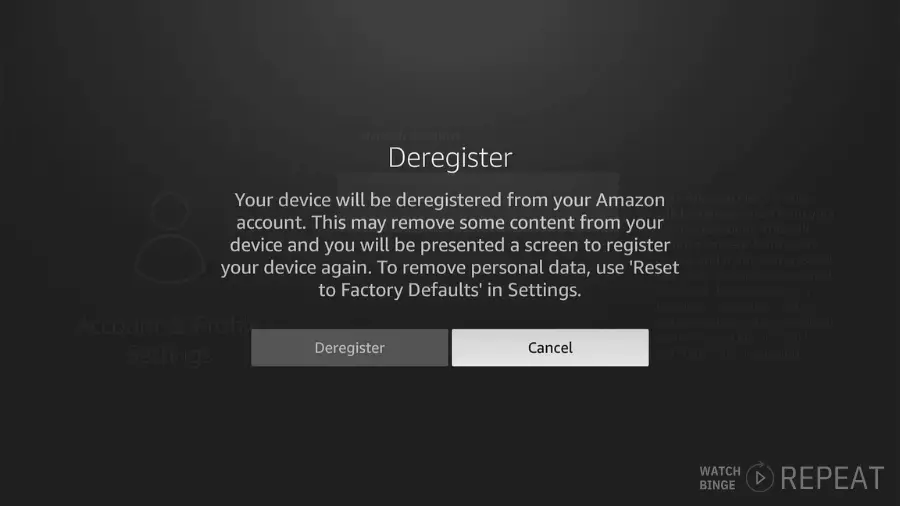
Once deregistered, you’ll be prompted to register your Firestick again. Follow the on-screen instructions to log in with your Amazon account credentials. This step re-links your Firestick with your account.
Step 6.4: Check for Resolution
After reregistering, navigate back to the home screen. Check if the error message is resolved and if you can access your Firestick’s features as normal.
Contact Amazon Support for Personalized Assistance
If you’ve diligently followed all the previous steps and the error on your Fire Stick persists, it may be time to seek direct assistance from Amazon Support.
Their team can offer personalized help and potentially identify issues that are specific to your device or account.
Closing Thoughts
This simple fix can quickly resolve the ‘Home is Currently Unavailable’ error on your Fire Stick. Most of the time, this issue is due to the Wi-Fi being turned off, and re-establishing the network connection is all that’s needed.
If you’re still experiencing difficulties or have any questions, feel free to leave a comment below.