Today, I’m excited to show you how to change your IP address on your Amazon Fire Stick.
This process can be particularly useful for ensuring a stable network connection or for specific networking needs. Let’s get into the steps:
4 Steps to Find Your Firestick IP
This method is particularly useful if you’re setting up your device to connect to a specific DNS server or if you’re troubleshooting network-related issues.
Navigating your Fire TV Stick to check network details may seem daunting, but it’s quite straightforward. Whether you’re troubleshooting your connection or simply curious about your network stats, this guide will walk you through the process with ease.
Step 1: Navigate to Settings
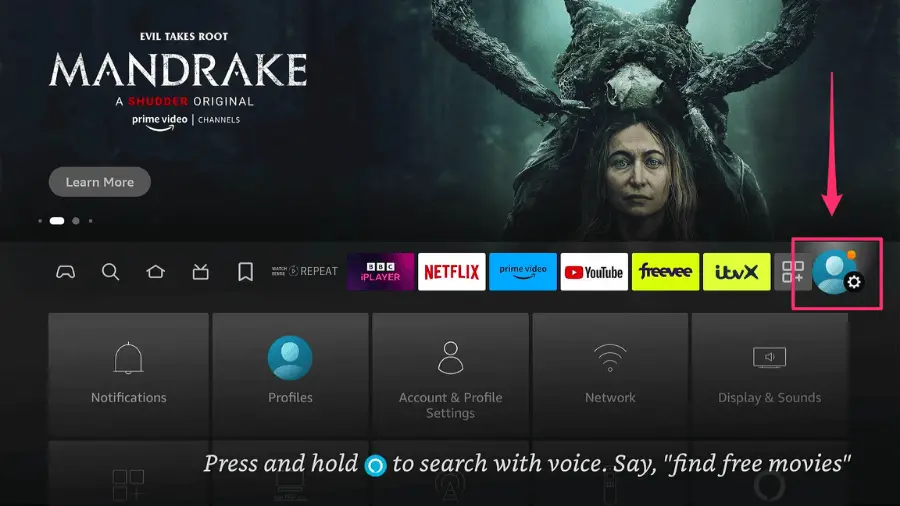
Start on the home menu and use the directional pad on the remote to move right. Keep going until you find the ‘Settings’ option—it should be easy to spot. Press the center button on your remote to select it.
Step 2: Locate ‘My Fire TV’
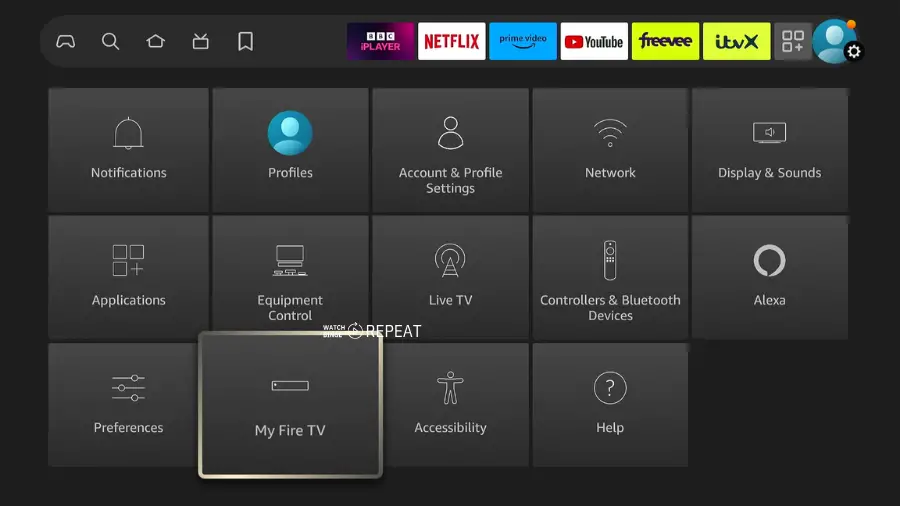
In the ‘Settings’ menu, scroll through the options by moving right until you come across ‘My Fire TV’. This is usually towards the end of the list. To select it, simply press the center button on your remote again.
Step 3: Access About Section
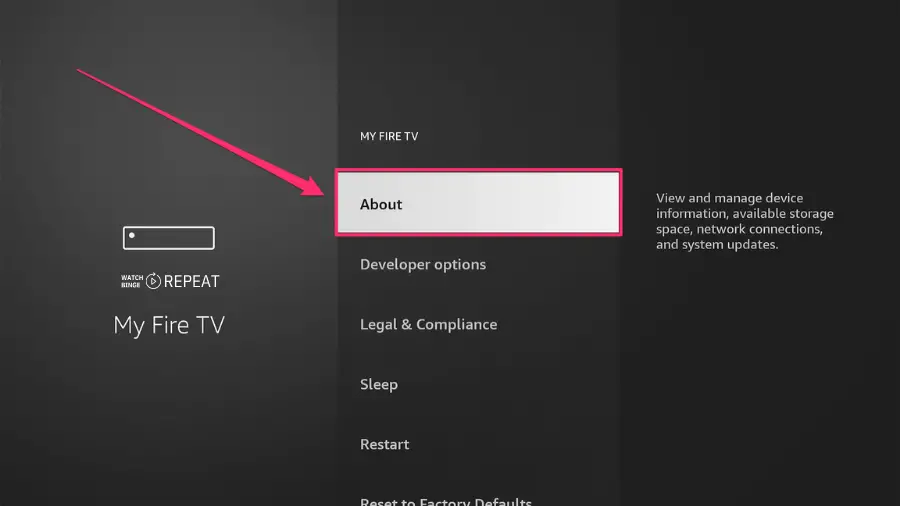
Inside the ‘My Fire TV’ section, look for the ‘About’ option. Highlight it and press the center button to enter this subsection.
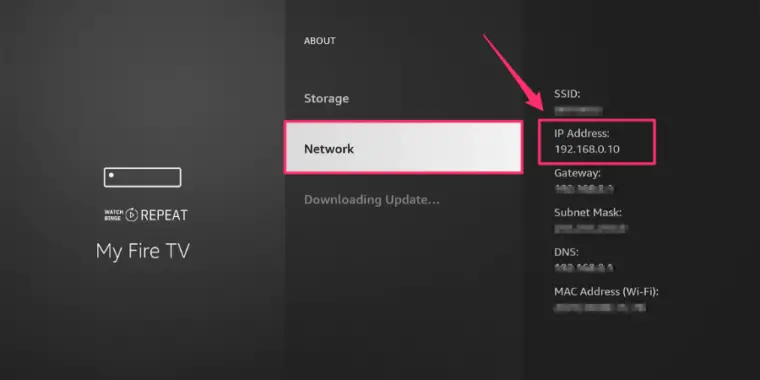
Step 4: Find Network Information
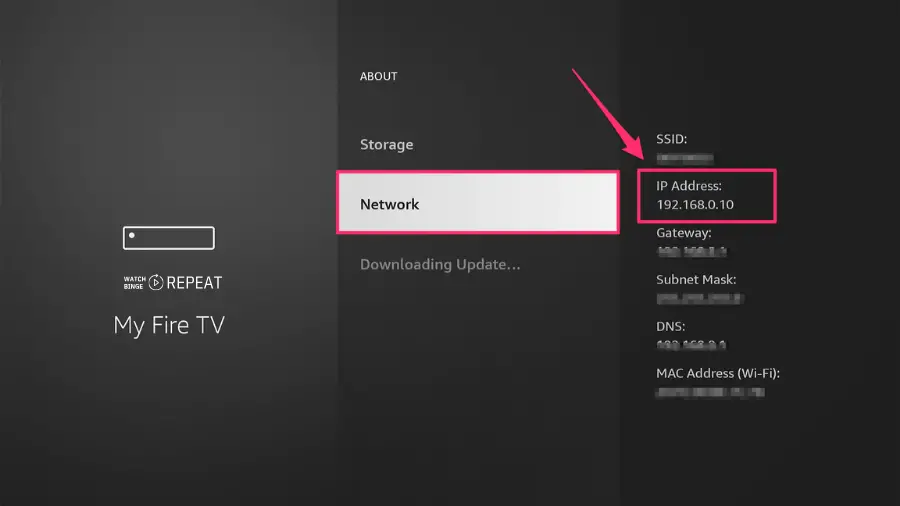
In the ‘About’ section, scroll until you reach the ‘Network’ option. Here you will find a treasure trove of data about your connection.
The screen will show you the SSID, which is your Wi-Fi network’s name, along with vital details like your IP address, gateway, subnet mask, and DNS server settings.
Alternative Method: Scanning Network for IP Address
If you don’t have access to your Fire TV, you can use a network scanning tool to find the IP address.
Step 1: Download Angry IP Scanner
This tool is available for Linux, Windows, and Mac. Download and install it on your computer.
Step 2: Configure the Scanner
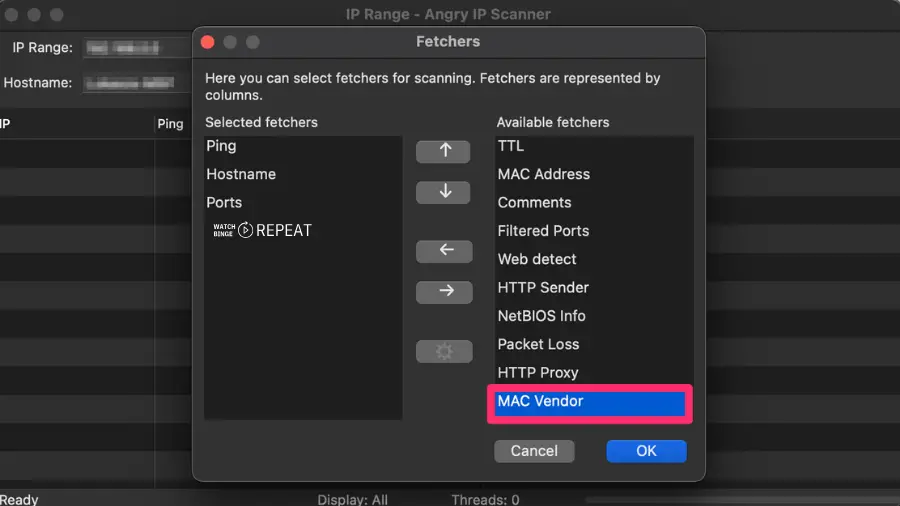
After installing, open the program and go to ‘Fetchers’.
Move the ‘MAC Vendor’ option to the left column to easily identify devices by their manufacturer.
Step 3: Scan Your Network
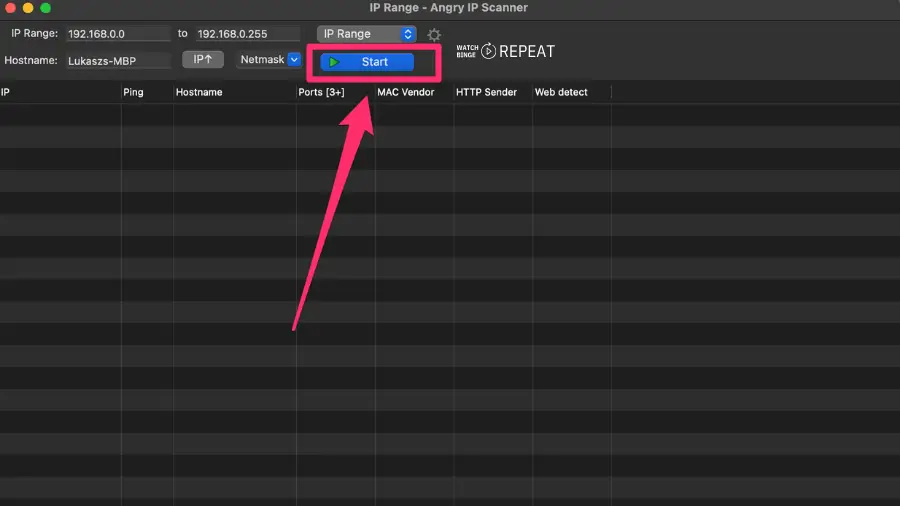
Start the scan. The tool will analyze all devices connected to your network.
Step 4: Identify Your Fire TV
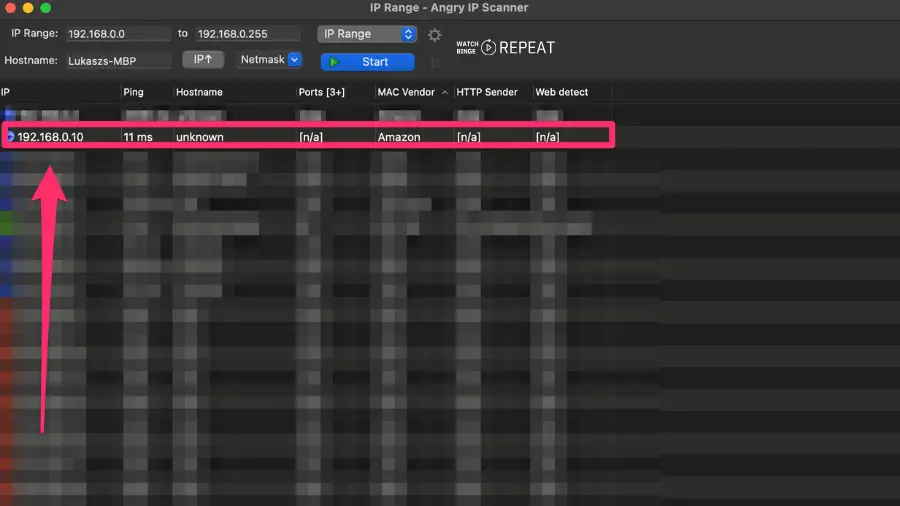
Once the scan is complete, sort the results by the ‘MAC Vendor’. Look for the entry where the vendor is listed as ‘Amazon’. This entry is your Fire TV.
The IP address will be displayed in the left column, typically labeled as ‘Android 2 local’.
Closing Thoughts
I hope this guide has helped show you how to check your network settings on your Fire TV Stick. If you found this guide useful, don’t forget to explore other articles on my blog.